How To Enable Motherboard HDMI Without Integrated Graphics?
Your motherboard’s HDMI port can only be used when the CPU has an integrated GPU. The motherboard’s HDMI connector requires an integrated GPU, even if you have a dedicated GPU. Additionally, your motherboard’s HDMI cannot be enabled. Let’s learn How To Enable Motherboard HDMI Without Integrated Graphics?
The HDMI will only work with motherboards with a CPU with an integrated GPU; otherwise, the monitor will show a black screen. The system will function properly even if your screen is black. There won’t be anything on your monitor for you to view.
How To Enable Motherboard HDMI Without Integrated Graphics?
No, it cannot be utilized without a CPU with integrated graphics. One of the three DisplayPort outputs on your RX 570 may be converted to HDMI for your TV for a reasonable price with an adaptor.

Your RX 570 should have three DisplayPort outputs, though. You might also use the DVI port; these adapters are likewise quite affordable and widely used.
How To Enable Motherboard HDMI?

Step 1: Check For Integrated Graphics In Your CPU
Determine whether your CPU has integrated graphics before turning on the motherboard HDMI. Your motherboard’s HDMI connector uses integrated graphics rather than the GPU to power it.
There are several ways to verify this. The quickest way to determine whether your CPU has integrated graphics is to open Device Manager and look in the Display Adapter menu.
Finding the processor model and obtaining the data online is an additional technique. Open Settings and choose a system to do this. Then select About.
The processor model will be accessible. Alternatively, you can choose Properties by right-clicking on My Computer or This PC. The processor model will also be visible here. Check Google using the model name to discover whether it has integrated graphics.
Step 2: Enable Integrated Graphics In BIOS
You must enable integrated graphics in BIOS after confirming that your CPU has them using one of the techniques above. Follow the steps outlined below to do this.
Press any of the following keys: F1, F2, F8, F12, Escape, and Delete, then restart your computer. This will launch the BIOS. The handbook for your motherboard has the precise key that you need.
For different motherboard models, the BIOS interface will differ. All of your computer’s critical settings can be found in the BIOS. Therefore, you must be cautious when traversing the BIOS panel to avoid unintentionally changing other settings.
Locate the BIOS Advanced tab or section. Now, look for the Multiple Display and IGPU settings. Make sure that this option is turned on.
This will enable the HDMI on your motherboard. Save the adjustments after that, then press Enter to confirm the changed settings. Restarting your computer will make the updated settings effective.
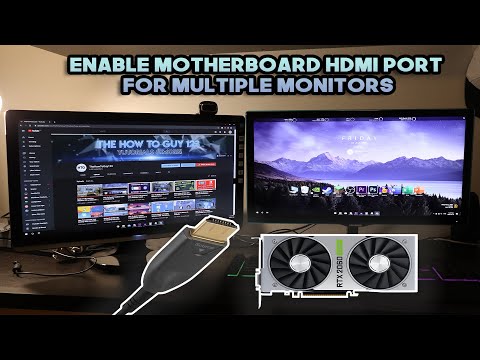
Step 3: Connect To Your New Monitor
You can connect the monitor to the HDMI port after turning on the motherboard’s HDMI. The steps of connecting two monitors to the CPU are listed below.
Start by connecting the main display to the rear HDMI connector on the video card. Next, connect the HDMI of the secondary monitor to the motherboard.
The other end of the HDMI cables should then be connected to the appropriate monitors. Your computer will automatically identify the two monitors after the connections are made.
After that, you must set up the display settings. Select Display Settings by right-clicking anywhere on your primary monitor’s Desktop screen. The menu for display settings will appear. The monitor settings can be configured however you like.
Step 4: Install The Integrated Graphics Driver To Its Latest Version
Even when the motherboard HDMI is enabled, and the display settings are set properly, there are some instances where the secondary monitor won’t be recognized. This may be the result of an outdated or uninstalled onboard graphics driver.
The steps listed below can be used to install or update the driver. Enter the name of Device Manager into the Windows search box to launch it. Now, check for an unknown device in the Other Devices section.
Then, go to the company’s website that makes your CPU and use the CPU model search to get the most recent drivers.
You can also allow your computer to look for the most recent driver. The alternative is to identify and download the most recent driver using Windows’ native Check for Updates capability.
Following the on-screen directions, you can run the setup after downloading and installing the driver. Restarting your computer after that will save the modifications. The secondary display will be recognized when the machine starts up.
What Causes Motherboard’s HDMI To Not Work?
There may be a time when you would like to use the motherboard’s HDMI connector, whether your dedicated graphics card has failed or you want to check how the integrated graphics function.
There are numerous causes for the HDMI port on your motherboard to malfunction. Several of them are listed below:
- No built-in GPU
- The BIOS has the integrated GPU disabled.
- Old integrated graphics driver
- Defective motherboard
- A broken HDMI cable
Can I Use Motherboard HDMI Without Integrated Graphics?
Connecting a motherboard’s HDMI port with integrated graphics is possible. If the CPU lacks an iGPU, the motherboard’s HDMI will not function, even if you have a dedicated graphics card.
Conclusion
You cannot enable motherboard hdmi without integrated graphics. You can use it if it has integrated graphics. For your second display device to function properly once you have activated the motherboard HDMI, you must upgrade the graphics driver to the most recent Version.
Use the comments area to let us know your questions or doubts. You can also leave comments on the page with your thoughts.
Top FAQ’s
Can a motherboard HDMI work without integrated graphics?
The motherboard can operate without an external graphics card and supports integrated graphics CPUs. However, a CPU without integrated graphics will not function with the motherboard’s HDMI connector.
How can I make my motherboard’s HDMI port functional?
The HDMI output for the CPU’s inbuilt graphics has likely been disabled. Check the CPU onboard graphics multi-monitor setting under the Advanced/System Agent Configuration/Graphics Configuration menu by tapping and holding the Delete or F8 keys to access the bios setup. If necessary, enable this bios parameter.
Why is my motherboard HDMI not detecting the monitor?
Most frequently, a physical issue (such as a damaged connection or connector) or an incompatibility (such as a CPU without integrated graphics) is to blame. In some circumstances, you’ll need to manually enable your GPU in the BIOS/Device Manager for it to work because BIOS settings may also be to blame.
Can I use the HDMI port on my motherboard as an input?
Only those without discrete graphics cards can use the motherboard HDMI. Give preference to your dedicated video card. Even if you don’t, your system will use it by default when you connect. When the dedicated video card ports are full, only use the motherboard’s integrated graphics through the HDMI port.
This is Mohammad Talha, a fervent tech enthusiast with a Computer Science degree, has been reviewing products and assisting the digital community for over 6 years. My passion for technology is matched only by my dedication to helping others navigate the ever-evolving digital landscape.


