Can You Screen Record On Asus Laptop? 9 Free Simplest Tools
This article has all the information about Can You Screen Record On Asus Laptop? Screen recording on an Asus laptop has become an essential tool for many, whether it’s for capturing memorable gameplay moments, creating instructional tutorials, or documenting software glitches.
With the rise of remote work and online education, the demand for reliable screen recording solutions has surged. But how can you screen record on an Asus laptop exactly? Let’s dive into the various methods and tools available, starting with the built-in Game Bar feature in Windows 10.
Can You Screen Record On Asus Laptop?
Absolutely! If you have an Asus laptop running on Windows 10 or a newer version, you can easily record your screen using a built-in feature called the Game DVR.
It’s a handy tool that lets you capture whatever is happening on your screen, whether it’s for a school project, a fun video, or just to show something cool to your friends. And if you want more advanced features, there are other software options you can explore too!

Why Record Your Asus Laptop Screen?
Screen recording has become an essential tool for many professionals and students alike. Whether you’re creating a tutorial, capturing gameplay, or recording a webinar, the ability to record your screen provides immense value.

For Asus laptop users, the good news is that there are multiple ways to achieve this, both with built-in features and third-party tools.
Does Asus Laptop Have Its Own Recording Function?
Asus laptops, like many modern computers, come equipped with built-in screen recording capabilities. However, the functionality might be limited compared to specialized software.

For more advanced features or higher-quality recordings, users often turn to third-party solutions. But for quick and straightforward recordings, the built-in tools can be more than sufficient.
How to Record Screen on Asus Laptop Windows 10 with Game Bar?
The Game Bar is a feature in Windows 10 designed primarily for gamers, but it’s also a handy tool for screen recording. To use it:
- Press
Win + Gto open the Game Bar. - Click on the record button or press
Win + Alt + Rto start recording. - Once done, click the stop button or press
Win + Alt + Ragain to stop recording.

The recorded videos are typically saved in the “Captures” folder inside the “Videos” library. Remember, while the Game Bar is convenient, it might not offer advanced editing features or the ability to record specific regions of the screen.
Third-Party Solutions
Awesome Screenshot & Recorder: One Extension for All Your Needs
Awesome Screenshot & Recorder is a versatile browser extension that allows users to capture screenshots and record screen activity both within their web browser and on the desktop. Compatible with popular browsers like Chrome, Firefox, Edge, and Safari, it’s a top recommendation for Asus laptop users. Here’s why:
- Ease of Use: With a user-friendly interface, it’s simple to start recording or capture a screenshot.
- Annotation Tools: Enhance your screenshots with text, arrows, and other visual elements, making it easier to communicate information or emphasize key points.
- Cloud Storage: Save your recordings and screenshots directly to the cloud, freeing up local storage on your Asus laptop.
Steps to Use Awesome Screenshot & Recorder
- Download and install the extension to your preferred browser. After installation, launch it and sign in or create a new account.
- Click on “Record” and select from the available recording modes: “Desktop”, “Camera Only”, “This Tab”, or “Custom(This Tab)”. Adjust the video resolution and decide if you want to use the webcam or microphone.
- After setting your preferences, click “Start Recording”. Depending on your chosen mode, you might need to select a specific page, window, or area to record.
- To end the recording, click on the extension’s icon and then the “Stop” button.
- Your recording will be saved to the cloud automatically. You can access it in “My Items”, where you can also edit it online or generate a shareable link.
How to Record Your Asus Screen Using Camtasia?
Camtasia is a renowned screen recording and video editing software, favored by professionals, educators, and content creators. It’s known for producing high-quality instructional videos, presentations, and tutorials.

Steps to Use Camtasia
- Download and install Camtasia from its official website.
- Launch the software and select “New Recording”.
- Define the area of your screen you wish to record.
- Choose your audio source, such as system audio or a microphone.
- Click the red “Record” button to begin. Once done, click “Stop”.
- Review and refine your recording using Camtasia’s advanced video editing tools.
- Save your final video in your desired format and share it with your audience.
Screen Record on Asus with VLC
VLC media player isn’t just a tool for playing media files; it also offers a screen recording feature. Here’s how to use VLC to record your screen:
- Download and launch VLC media player.
- Navigate to the “Media” tab and select “Open Capture Device”.
- In “Capture Mode”, choose “Desktop”.
- Set your desired frame rate in the “Options” section and click “Play”.
- VLC will start recording your desktop. To stop, click the “Stop” button.
- The recording will be saved in your default video folder, typically as a .mp4 file.
How to Start Asus Screen Recording with OBS Studio?
OBS Studio is a powerful, open-source, cross-platform screen recording software that’s widely used for streaming and recording purposes. It’s known for its flexibility, allowing users to record multiple screens or monitors simultaneously. Here’s how to use OBS Studio for screen recording on an Asus laptop:

- Installation and Setup: First, download and install OBS Studio. Once installed, launch the software.
- Settings Configuration: Click on “Settings” located at the bottom right corner. A new window will pop up where you can choose the output format and destination for saving your recordings.
- Scene Creation: Return to the main interface and click the “+” icon in the “Scene” tab to add a new scene.
- Source Selection: Navigate to the “Sources” box next to the “Scene” tab. Click the plus icon at the bottom, select “Display Capture”, and choose “OK”. This will allow you to see the recording area.
- Start Recording: Once everything is set up, click the “Start Recording” button located in the lower-right corner of the screen. Your Asus laptop screen will now be recorded.
- Stopping the Recording: To end the recording, click the “Stop Recording” button.
OBS Studio offers a plethora of advanced settings and customizations, making it a top choice for those who require more than just basic screen recording.
Screen Record on Asus with Fraps
Fraps is a popular tool, especially among gamers, for recording gameplay. It’s simple to use and offers various modes for screen recording. Here’s how to use Fraps on an Asus laptop:
- Installation: Download and install Fraps. Once installed, launch the software.
- Settings Configuration: Adjust your recording settings. If you’re capturing gameplay or require higher quality recordings, you can modify the frames per second (fps) by clicking the 99FPS tab.
- Recording Options: Click on the “Movie” option. Here, you can select the location for saving recordings, set hotkeys for starting/stopping the capture, or choose audio sources.
- Start Recording: Minimize the Fraps window and press the Video Capture Hotkey to begin recording. If the numbers in the right-side corner of your screen turn red, it indicates the recording has started.
Fraps is especially beneficial for those who frequently play games on their Asus laptops and wish to capture their gameplay moments.
Joyoshare VidiKit is a versatile screen recording software that offers a comprehensive solution for capturing computer screens, gameplay, webcam videos, and specific windows.
It’s designed to cater to a wide range of recording needs, from simple screen captures to professional video productions. Here’s a step-by-step guide on how to use Joyoshare VidiKit on an Asus laptop:
Download and Install
- Install and Launch Screen Recorder: Download Joyoshare VidiKit and install it on your computer. Launch the software and navigate to the “Recorder” section, then select “Screen Recorder”.
Setting Preferences
- Select Recording Area: Click on the drop-down menu to choose your desired recording area, such as “Full Screen”, “1920×1080”, “1024×768”, or customize the area by scaling and moving the recording window.
- Audio Settings: Joyoshare VidiKit allows simultaneous video and audio recording. You can choose to capture system audio, microphone sound, or both. For streaming videos, it’s recommended to turn off the microphone sound to avoid background noise.
- Customize Recording Settings: Access the settings to set the output location, video format, recording hotkeys, cursor effects, and webcam preferences. Joyoshare VidiKit supports various output formats like MP4, M4V, AVI, MOV, and more.
Recording Process
- Start Recording: Once your settings are in place, click the “REC” button to begin capturing your screen. You can take screenshots, trim videos, and pause the recording as needed.
- End and Manage Recording: Click the “Stop” button to finish the recording. You can preview the recorded video, edit its name, trim unwanted parts, and take snapshots.
Joyoshare VidiKit also offers specialized recording modes like “Game Recorder” for capturing gameplay, “Webcam Recorder” for real-time webcam videos, and “Window Recorder” for recording specific windows in the background.
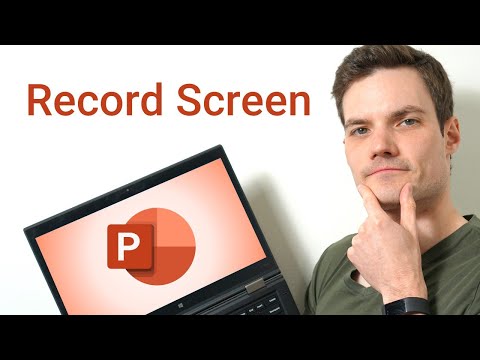
Screen Record on Asus with PowerPoint
Microsoft PowerPoint is not just a presentation tool; it also offers a built-in screen recording feature. This functionality is especially useful for educators, trainers, and professionals who want to create instructional videos or presentations with screen captures. Here’s how to use PowerPoint to record your screen on an Asus laptop:

- Open PowerPoint: Launch Microsoft PowerPoint on your Asus laptop.
- Access the Recording Feature: Navigate to the “Insert” tab in the ribbon and select “Screen Recording”.
- Select Recording Area: A control dock will appear at the top of the screen. Click on “Select Area” to choose the specific region of your screen you wish to record. If you want to record the entire screen, simply drag your cursor from one corner to the opposite corner.
- Audio and Pointer Options: Before starting the recording, decide if you want to capture audio or record pointer movements. You can toggle these options on or off using the respective icons in the control dock.
- Start Recording: Click the “Record” button (red circle icon) to begin capturing your screen.
- Pause or Stop: During the recording, you can pause anytime by clicking the “Pause” button. To finish the recording, click the “Stop” button.
- Insert Recording into Slide: Once the recording is complete, PowerPoint will automatically insert the screen recording into the current slide. You can play it directly within PowerPoint or right-click to save it as an MP4 file.
This feature in PowerPoint is a handy tool for those who need a quick and straightforward way to record their screen without the need for additional software. However, for more advanced recording features, third-party software might be more suitable.
Capture Screen Activities on Asus with CamStudio
CamStudio is a free, open-source screen recording software that’s ideal for creating visual demonstrations or tutorials. It’s especially useful for those who need a straightforward tool without the complexities of professional-grade software. Here’s a guide on how to use CamStudio on an Asus laptop:
- Installation: Download and install CamStudio. Ensure you also download the necessary codecs for optimal recording quality.
- Setting Preferences: Upon launching CamStudio, navigate to the settings to configure your recording preferences. You can choose the recording area, adjust video quality, and select the desired video compressor.
- Select Recording Area: Before starting the recording, decide on the region of your screen you want to capture. CamStudio allows you to record the full screen or a specific area.
- Audio Settings: You can choose to record system audio, microphone sound, or both. Ensure you adjust these settings based on your requirements.
- Start Recording: Click the “Record” button to initiate the screen capture. A red indicator will appear, signifying the recording is in progress.
- Pause or Stop: If needed, you can pause the recording. To finish, click the “Stop” button.
- Save and Preview: After stopping the recording, you’ll be prompted to save the video file. Choose a suitable location and save the file. CamStudio will then automatically play the recorded video for you to review.
CamStudio also offers the option to save recordings as SWF (Flash) files, which can be useful for embedding in websites or online presentations.
While CamStudio might not offer the high-end features of some other screen recording software, it’s a reliable choice for basic recording needs, especially given its free price tag.
Tips for Successful Screen Recording on Asus Laptop
Screen recording on an Asus laptop can be a seamless experience if you follow some essential tips. These tips ensure that your recordings are of high quality and serve the intended purpose effectively:

- Choose the Right Software: Depending on your needs, select a screen recording software that aligns with your requirements. For basic recordings, built-in tools like the Windows Game Bar might suffice. However, for professional-grade recordings, consider using dedicated software like OBS Studio or Joyoshare VidiKit.
- Ensure Adequate Storage: Before starting a recording, especially a long one, ensure that your Asus laptop has enough storage space. High-resolution recordings can consume significant storage.
- Close Unnecessary Applications: To prevent any disruptions during the recording, close all unnecessary applications. This not only ensures a smooth recording experience but also conserves system resources.
- Use a Good Quality Microphone: If your recording involves voice narration, invest in a good quality microphone. Clear audio can make a significant difference in the overall quality of your video.
- Test Before Recording: Before you start the actual recording, do a quick test run. This helps in identifying any potential issues with the software settings or hardware.
- Use Hotkeys: Familiarize yourself with the hotkeys of your chosen screen recording software. Hotkeys allow you to quickly start, pause, or stop a recording without navigating through the software interface.
- Edit for Clarity: Once your recording is complete, consider editing it for clarity. Remove any unnecessary parts, add annotations, or include transitions to make the video more engaging and understandable.
By following these tips, you can ensure that your screen recordings on an Asus laptop are of the highest quality and serve their intended purpose effectively.
Comparison of Asus Screen Recorders(PROS & CONS)
When it comes to screen recording on an Asus laptop, there are several software options available, each with its unique features and capabilities. Here’s a comparison of some popular screen recorders tailored for Asus laptops:
Pros
- Straightforward and intuitive platform with unlimited recording time.
- Provides a prolific list of effects, transitions, and add-ons.
- Offers 4K video recording and supports screen, webcam, and mic recording.
- Suitable for video beginners.
Cons
- Does not offer mobile recording.
- The free version is watermarked.
System Availability: Windows & Mac
Camtasia
Pros
- Provides a massive library of effects and transitions.
- Offers high-resolution results in videos.
- Allows sharing files in various modes.
Cons
- High price.
System Availability: Windows & Mac
OBS Studio
Pros
- Provides an audio mixing facility with an explicit toolkit.
- Offers simple configuration options
Cons
- Takes longer times to process.
- No video editing functions.
System Availability: Windows, Mac & Linux
ScreenFlow
Pros
- Exemplary media management.
- Stable platform with impressive export options.
Cons
Cannot upgrade the platform for free.
System Availability: Mac only

Conclusion
Screen recording on an Asus laptop is a versatile tool that caters to various needs, from capturing gameplay moments to creating professional presentations. With the evolution of technology, there are now multiple ways to record your screen, each offering unique features and capabilities.
The built-in Game Bar in Windows 10 provides a straightforward method for quick screen captures, especially for gamers. However, for those seeking more advanced features or editing capabilities, third-party software like Camtasia, OBS Studio, or Joyoshare VidiKit might be more suitable.
When choosing a screen recording method, it’s essential to consider the purpose of the recording. For instance, if you’re creating a tutorial, you might need software that offers annotations and editing tools. On the other hand, if you’re recording gameplay, real-time recording without lags would be crucial.
In conclusion, while the built-in tools offer convenience, third-party software provides a broader range of features. By understanding your requirements and exploring the available options, you can select the best method to screen record on your Asus laptop effectively.
People Also Ask
1. Does ASUS laptop have a screen recorder?
Yes, ASUS Laptops that run the Windows operating system come equipped with a built-in screen recorder known as Game DVR. This tool is primarily designed for capturing gameplay but can also be utilized for general video recording. If your Asus laptop operates on Windows 10 or a later version, it indeed has a screen recording feature.
2. How do I record my Asus laptop screen on Windows 11?
For those using Windows 11, the process of screen recording remains quite similar to Windows 10. You can initiate the recording feature by pressing the combination of Windows Key + ALT + R. Once activated, you can start the recording by clicking on the red circle button.
3. How can I record my laptop screen for free?
There are several free laptop screen recording tools available. Some of the recommended ones include:
EaseUS RecExperts
FlashBack Express
TinyTake
OBS Studio
Loom
VSDC Free Screen Recorder Software
XSplit Broadcaster
iSpring Free Cam
These tools offer various features, and you can choose one based on your specific requirements.
4. Can you screen record on Asus laptop?
Absolutely! Asus laptops, especially those running Windows, offer multiple ways to record the screen. Tools like the Xbox Game Bar, EaseUS RecExperts, VLC, and many others can be utilized for this purpose. The exact method might vary depending on the tool, but the process is generally straightforward.
5. What are the best tools for screen recording on Asus laptops?
Several tools are available for screen recording on Asus laptops. Some of the most effective and popular ones include EaseUS RecExperts, OBS Studio, Xbox Game Bar, Fraps, and VLC. Each tool has its unique features, and the best choice depends on the user’s specific needs, such as the type of content they wish to capture and any additional functionalities they require.
This is Mohammad Talha, a fervent tech enthusiast with a Computer Science degree, has been reviewing products and assisting the digital community for over 6 years. My passion for technology is matched only by my dedication to helping others navigate the ever-evolving digital landscape.
Related posts:

 11")


![Can’t Accept Terms And Conditions On Macbook? [Explained]](https://www.retardedarts.com/wp-content/uploads/2023/11/Cant-Accept-Terms-And-Conditions-On-Macbook.jpg.webp "Can't Accept Terms And Conditions On Macbook? [Explained] 68")